The GIF that Keeps on Giving

I’m an intern at IDEO who’s training to be an interaction designer. But one morning at 4 a.m., after an all-nighter studying a maze of sterile, methodically made wireframes, I felt the 15-year-old me frowning at my career choice. Who was this person obsessing over digital simplicity and efficiency? What happened to the girl who loved drama? Who loved a mess?
Not wanting to disappoint her, I started searching for some craft that would satisfy that messy complexity. I tried what I knew. Illustration might bring my imaginary characters and stories to life. But my skills were limited. Collage answered the urge for messy assembly, but lacked precision.
Then I tried making a GIF, that looping relic of the old web that’s come back as an art form. The beauty of GIFs is that they preserve a single moment, with all of its feeling, and play it back forever. It was imperfect. It was messy. I was mesmerized. It struck the balance me and my inner teenager needed.
I’ve found that custom GIFs can be made for all sorts of scenarios—to show thanks, explain an idea, even tell someone you’re thinking of them. Flowers pale in comparison to a custom-made GIF for your loved one this Valentine’s Day.
With my internship at IDEO ending soon, I decided to create a parting GIF to share my gratitude. Here’s how to make your own:
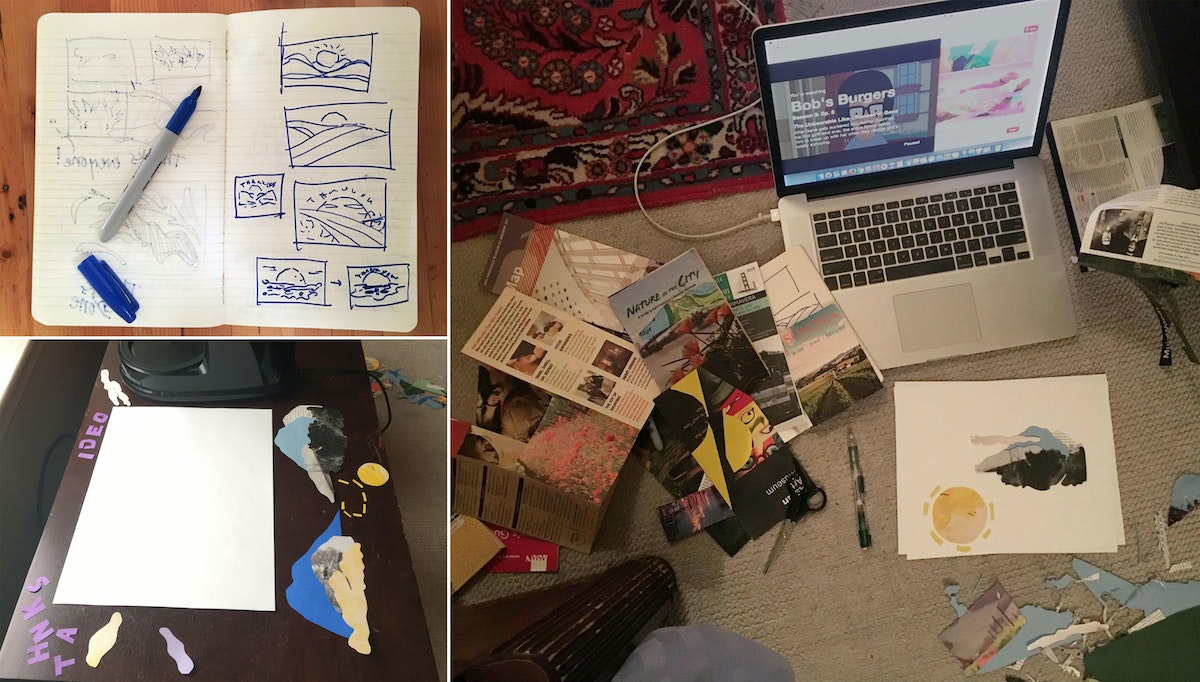
1. Find a concept. Don’t dwell here. Get to making quickly and don’t overthink it! I landed on the metaphor of a rising sun, symbolizing illumination and a new beginning thanks to my experience here.
2. Gather supplies. Don’t spend any money on materials—they’re all around you. I rounded up old San Francisco brochures from my landlord’s supply closet.
3. Form a composition. Clear a workspace or spread out on the floor (as I did here), collect your supplies, and start cutting. Cue Bob’s Burgers.

4. Photograph. Find a space by a bright window and a makeshift hand stabilizer—in this case it was an empty coffee machine. I shoot about 30 frames with my iPhone, moving each piece of paper by hand, frame after frame.
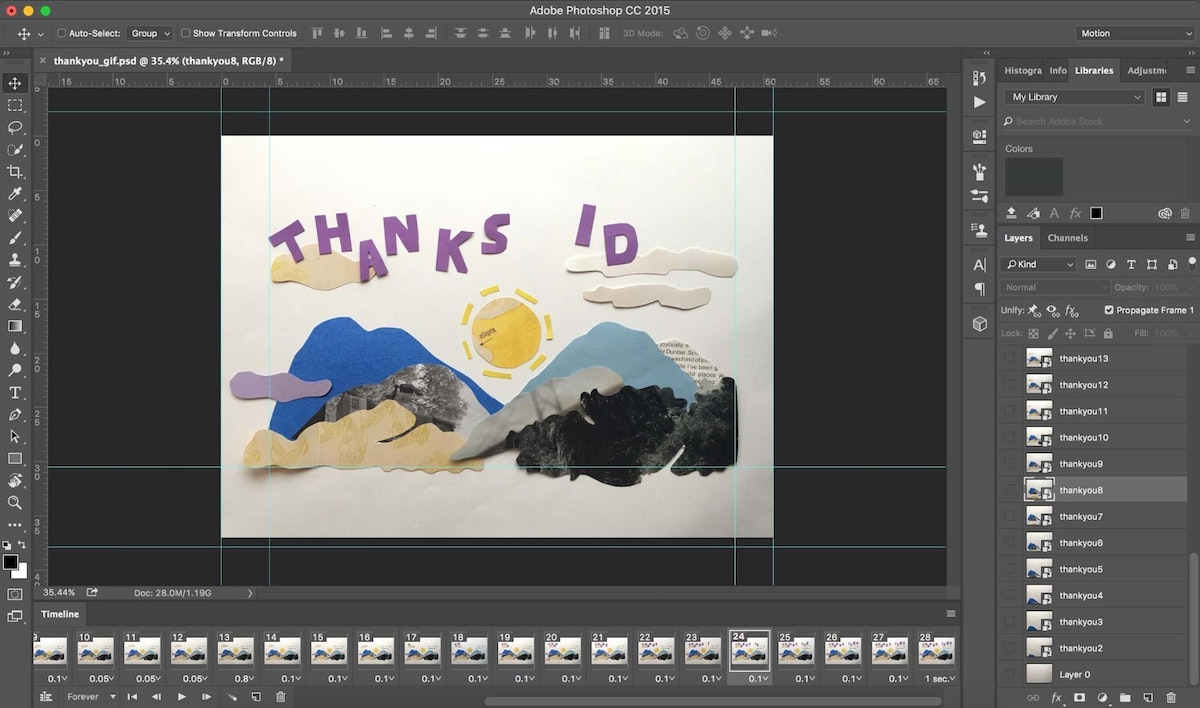
5. Assemble in Photoshop. With your batch of photos loaded into a Photoshop file, click “Create Frame Animation” from your Photoshop Timeline (pictured on the bottom of the screenshot below). This allows you to create a frame-by-frame animation, revealing one photo in your sequence per frame. Make any adjustments in light balance and cropping, and manually tweak the alignment of any shaky photos here, too.

6. Save and export. To export your finished GIF from Photoshop, choose “Save for Web (Legacy).” Adjust the export settings to pare your GIF down to a manageable file size. Add a watermark or signature if you want to ensure you'll get credit for your work.
7. Let it fly! GIFs can be embedded in email, posted on social media, even texted.
Words and art

Subscribe

.svg)


